This post is an extension of the Neural Modeling Guide. For more info on the whole process, please visit the general guide page.
Capturing the sound of a guitar amplifier is crucial for creating an AI model that simulates its effect accurately.
In this post, we will discuss the process of capturing the sound of a guitar amplifier for generating both single amp head and combo models.
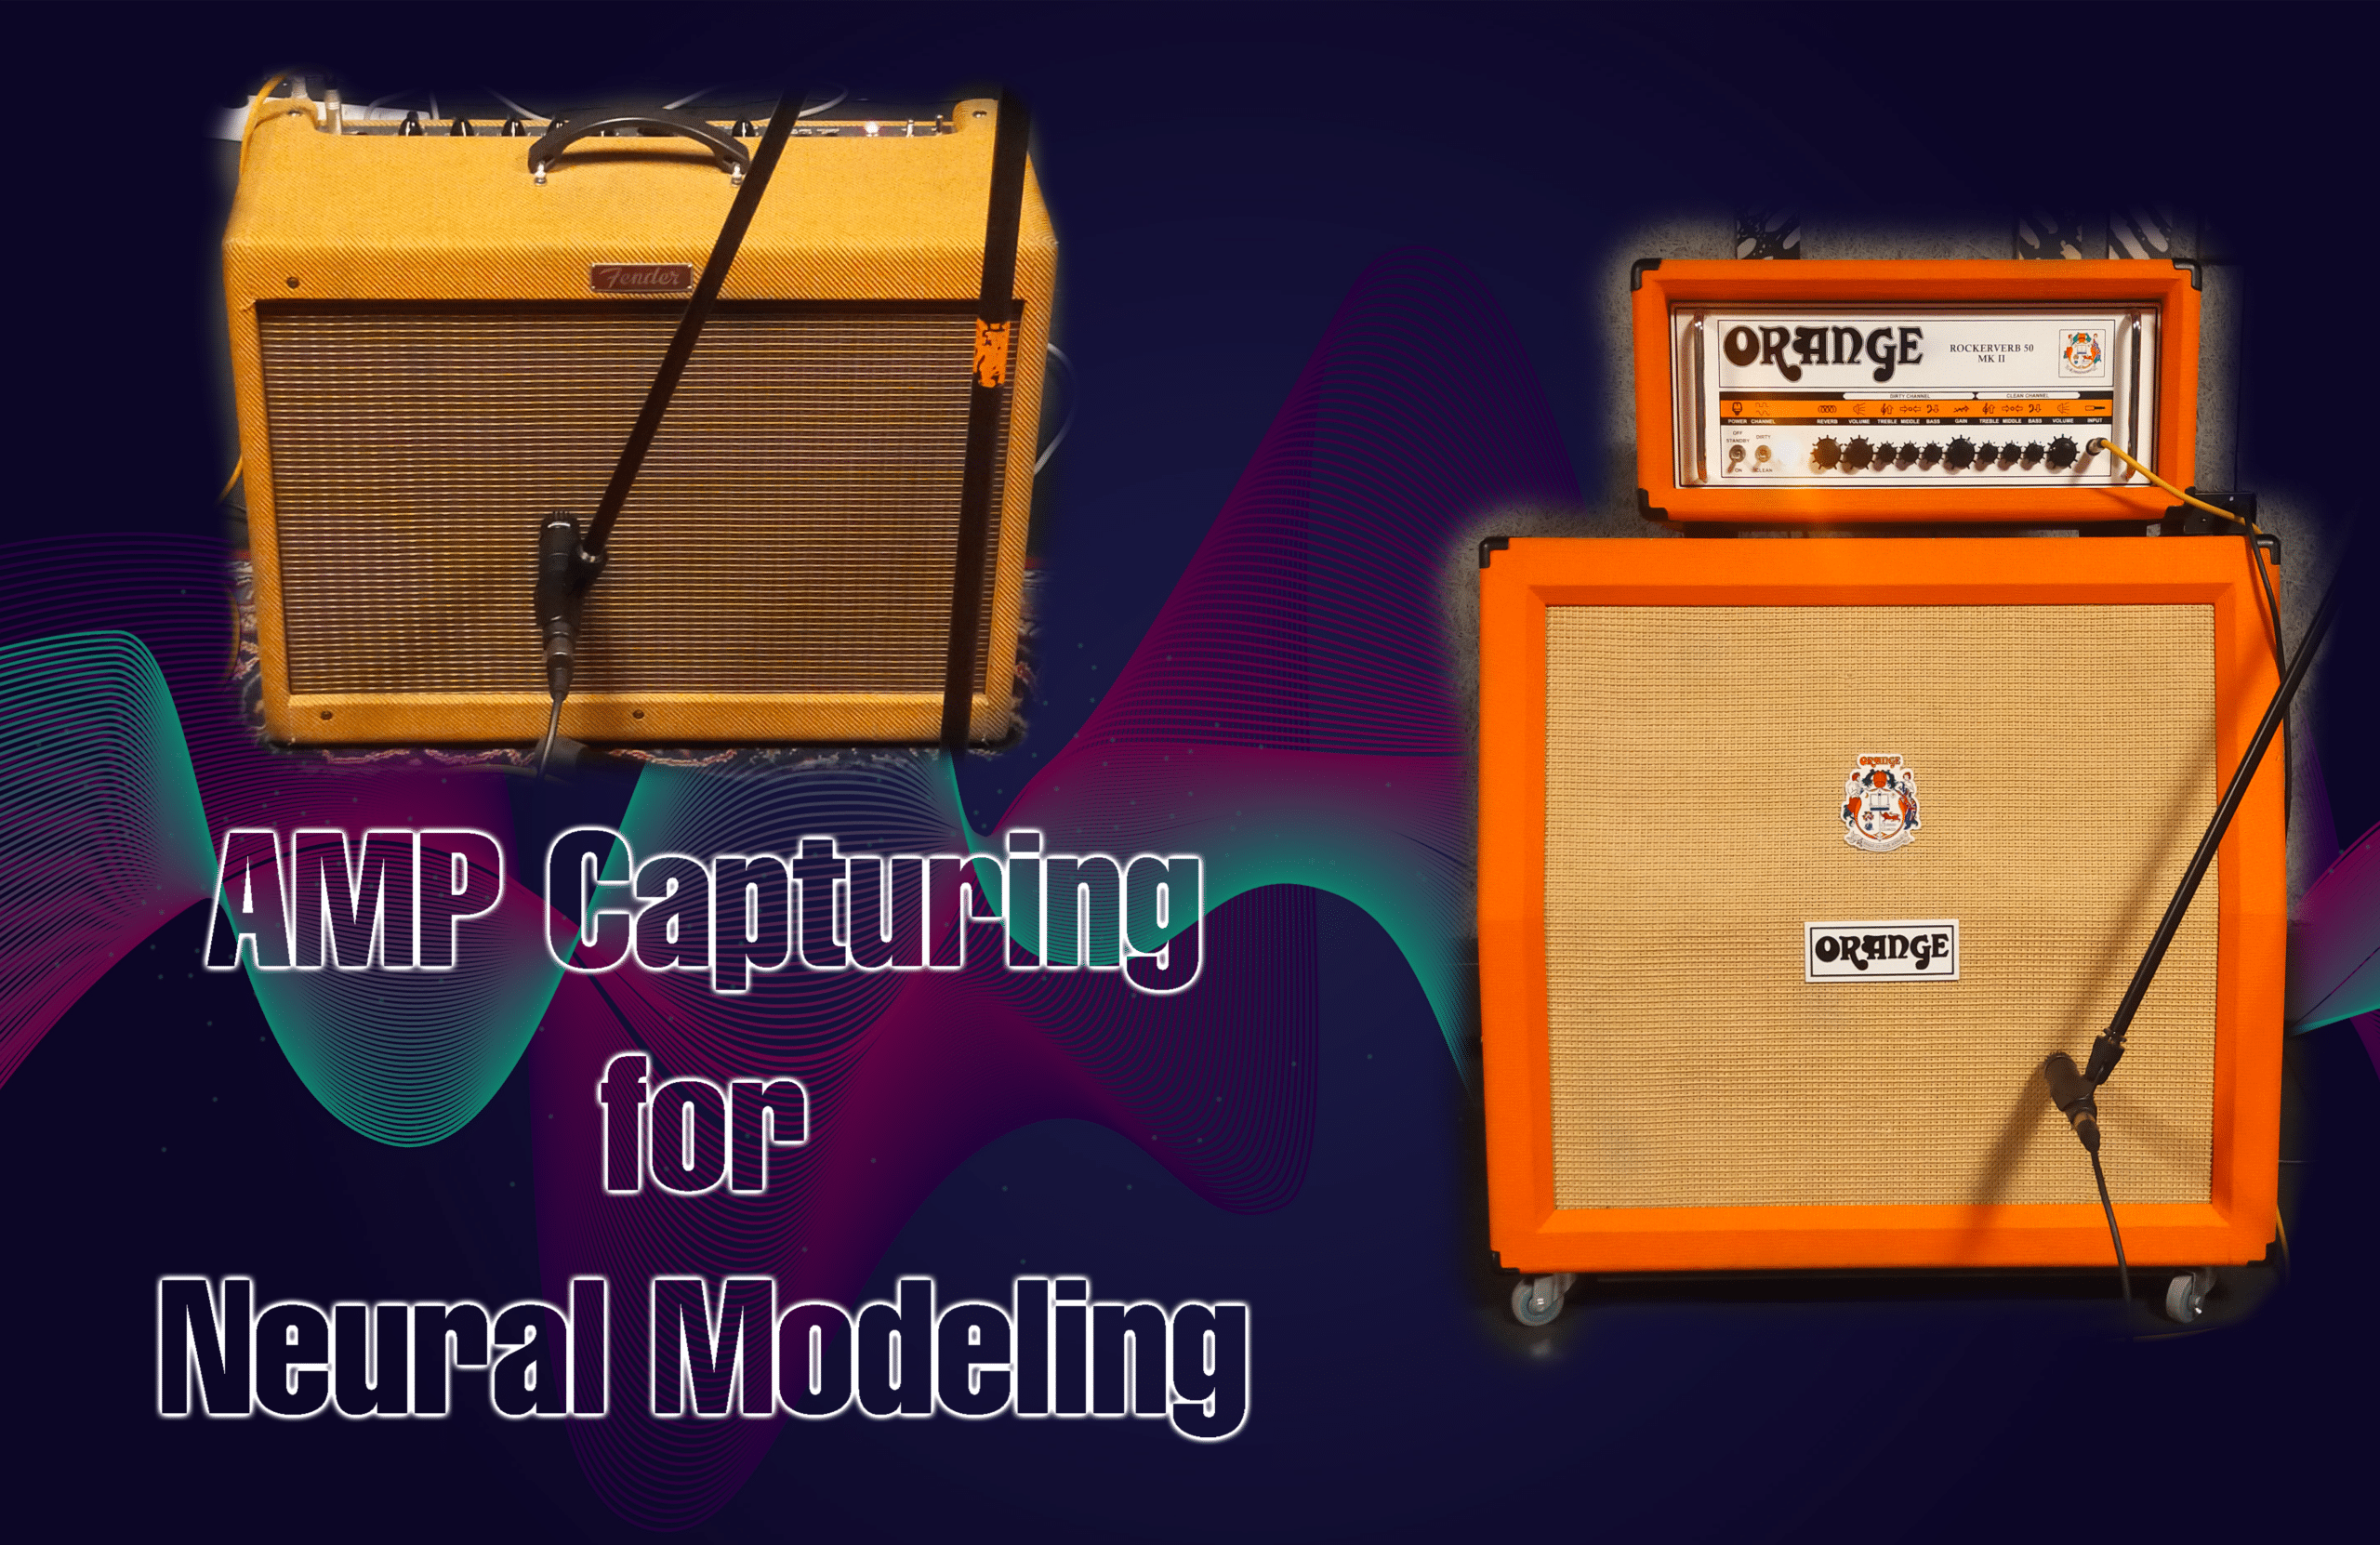
We will share examples of captures of two classic amps, wiring diagrams, pictures, and an input.wav file with various input signals for training the AI model.
The end result:
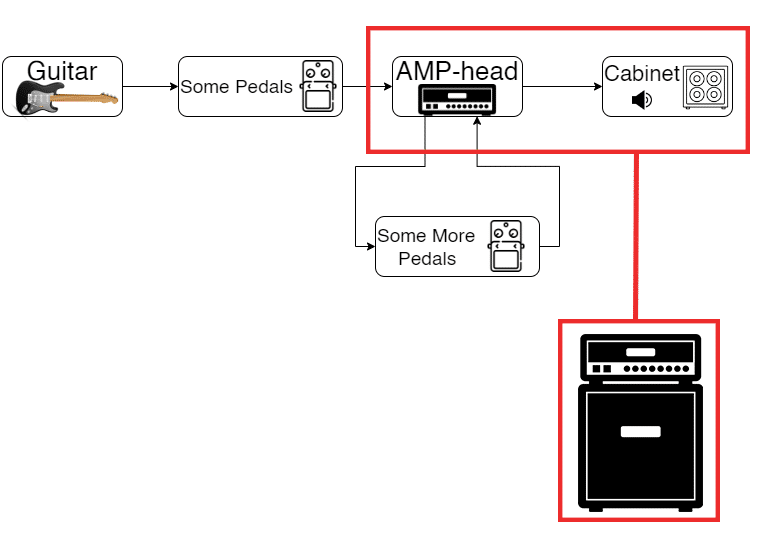
Capturing the output of the amplifier head and the output of the cabinet allows us to create two AI models that simulate guitar amplifiers: one model for the amplifier head alone and another for the amplifier-cabinet combination.
To train these models, we need two sets of audio files. The first set contains the capture signal (i.e., the dry guitar sound) and the corresponding sound after passing through the amplifier head, while the second set contains the sound after passing through both the amplifier and the cabinet.
These audio files serve as input and target files for training the AI models and helping them learn to generate realistic amplifier sounds (jump to 2:58 for guitar samples).
The input.wav file:
The input.wav file is a critical component of training an AI model to simulate a guitar amplifier. It serves as the “dry signal” that we feed into the model along with the target.wav, allowing it to learn the characteristics of the amplifier we want to simulate.
The input file is a crucial part of the guitar amplifier capture process. It’s the file that’s used as the input signal when capturing the sound of an amplifier. In general terms, the more diverse the input file is, the more of the amplifier dynamics it allows to capture.
The input file we’re sharing covers a wide range of signals, including not only dry electric guitar audio, but also other audio signals, to capture as much of the dynamics of the amplifier as possible.
The first part of the file is inspired from the input.wav file of the NAM project.
Gear requirements:
- Guitar AMP: The amp that you would like to capture the sound form.
- Computer: That will send the capture signal, and record the reamped signals.
- Audio interface: To connect your computer to audio sources.
- Reamp Box: To match impedence between the sound interface and the input of the AMP. Alternatively (not recommended), you can use guitar pedals that have buffers. This option has disadvantages. This video, for example, shows how to use a Boss pedal instead of a reamp box.
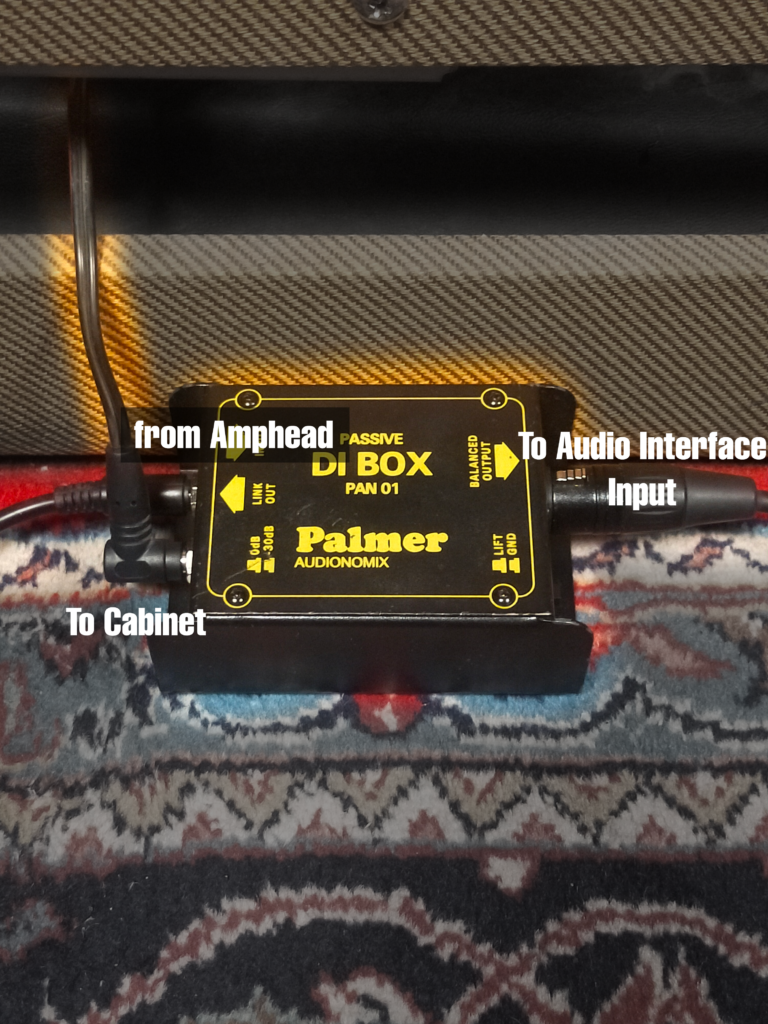
- DI : This will allow to extract the signal out of the poweramp before the cabinet.
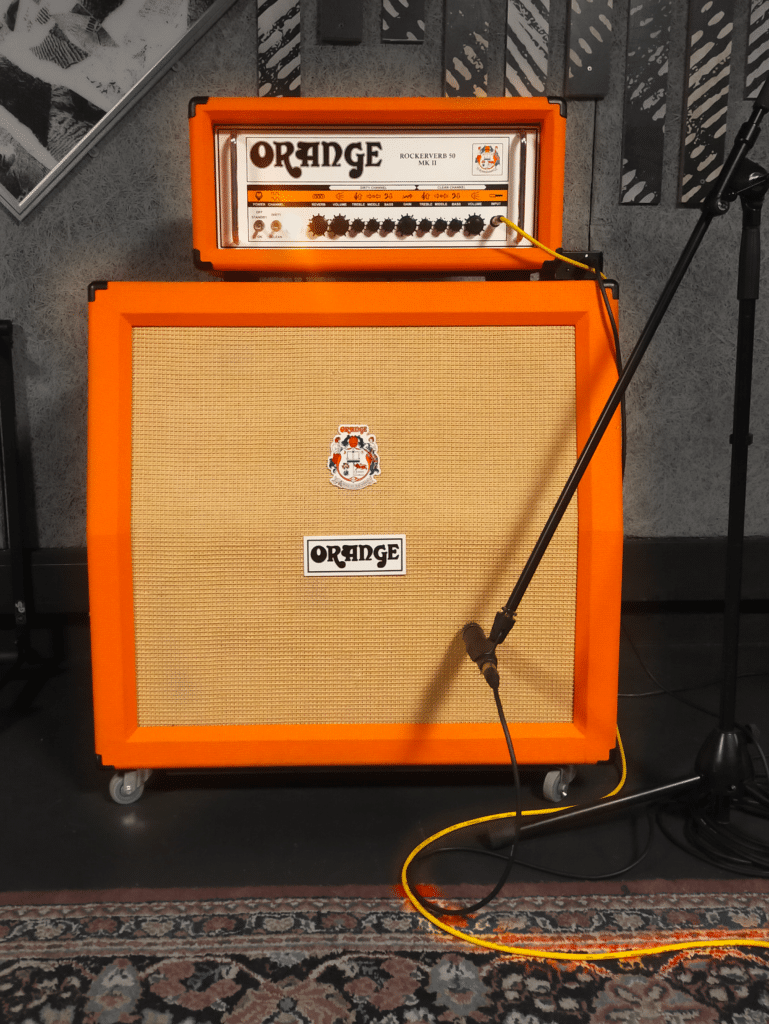
- MIC (optional for combo models): To record the output sound of the cabinet.
- Cables: To connect the different elements of the setup. Please make sure to choose the right type of cables depending the devices that you use.
Here’s an example list:
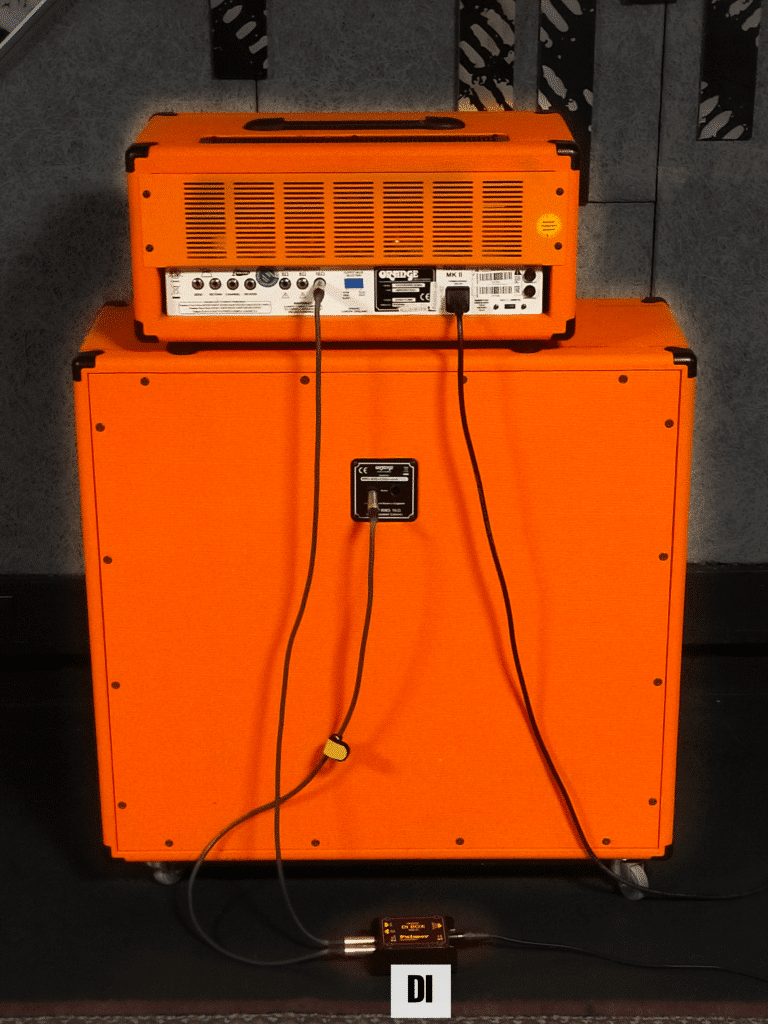
– 2x Speaker cable: AMP to DI and DI to Cabinet
– XLR or Jack cable (may change depending on your DI): DI to Audio Interface input1
– TRS-XLR cable (may change depending on your Reamp Box): Audio interace output to ReampBox
– TS Jack cable: Reamp Box to AMP input
– XLR cable: Mic to Audio Interface
Setup Diagram:
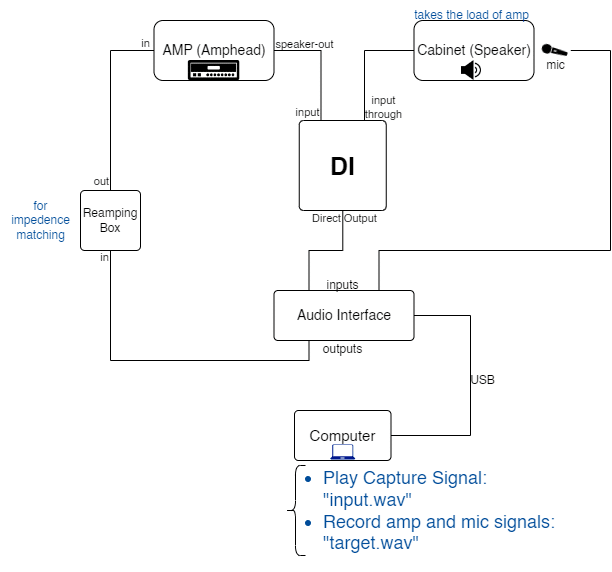
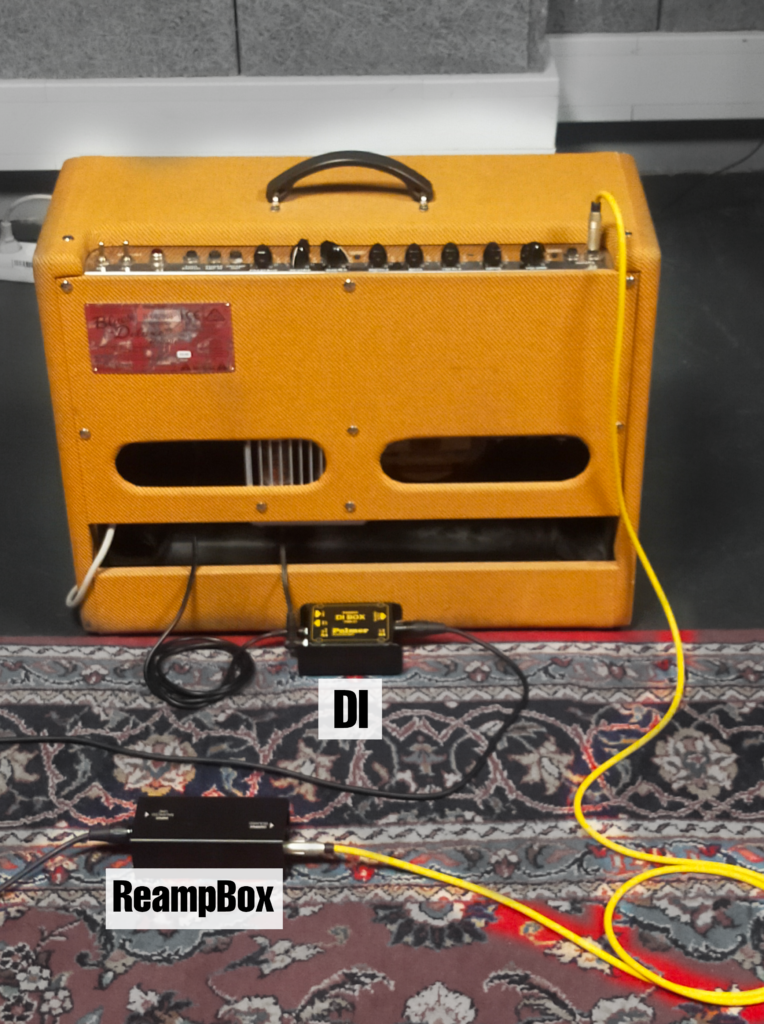
For this reamping setup, you’ll need to insert a DI (direct input) box between your amp and cabinet. The DI box will capture the signal of your amp, which you can then connect to one input of your audio interface. To capture the sound of your cabinet, you can also use a second input of your audio interface to mic the sound coming from your speaker cabinet at the same time.
To complete the setup, you’ll need to connect the output of your audio interface to the input of your amp through a reamping box, which ensures that the impedance of your signal is properly matched.
Once everything is connected, you can connect your audio interface to your computer via USB. Then, you can play the raw capture signal (input.wav) and record the outputs of your amp and cabinet simultaneously.
Safety Measures!
Make sure that the Cabinet is connected to the Amp-head through the DI. This is important because the cabinet is what accepts the huge energy load of the power-amp. Otherwise your Amp-head is prone to damage.
Wiring
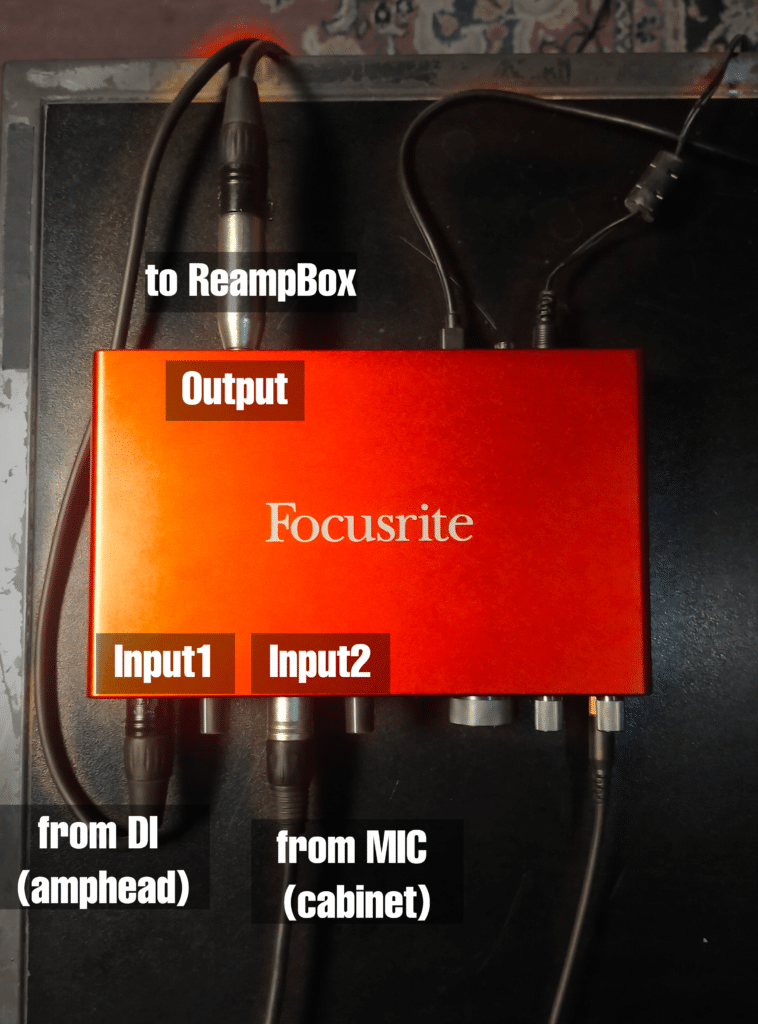
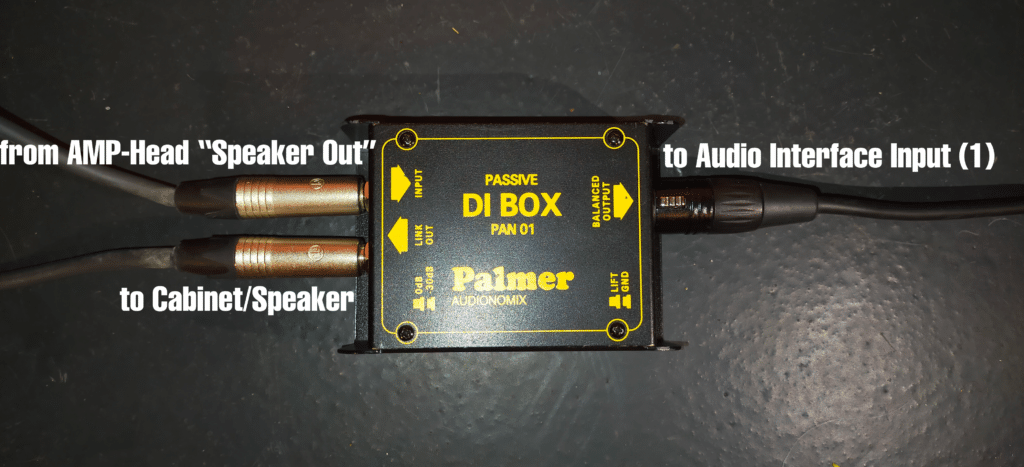
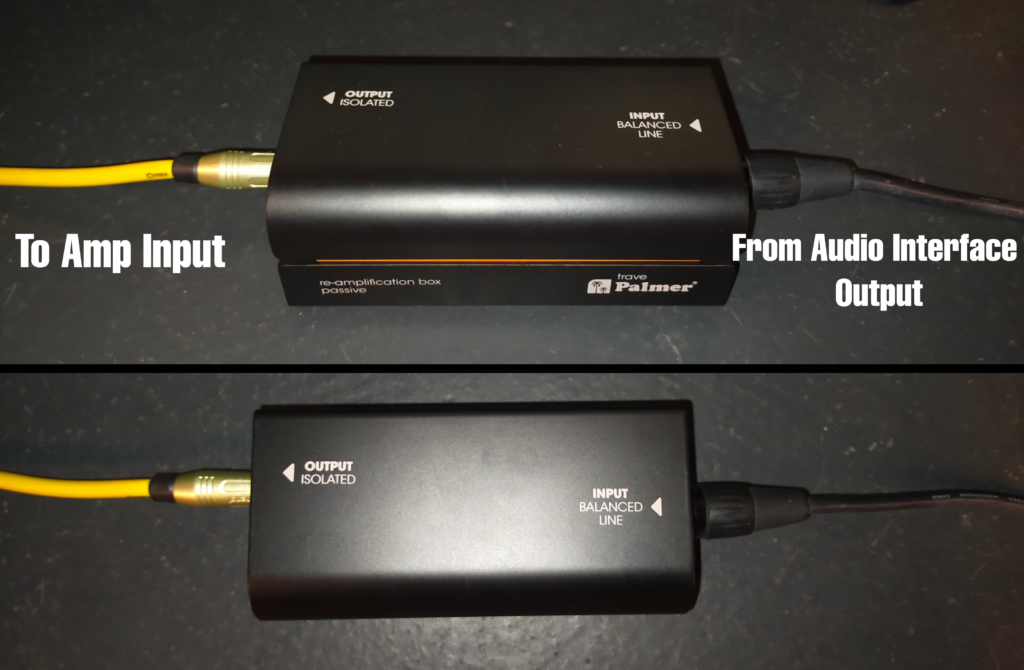
Practical Example 1: Orange Rockverb 50 MK II
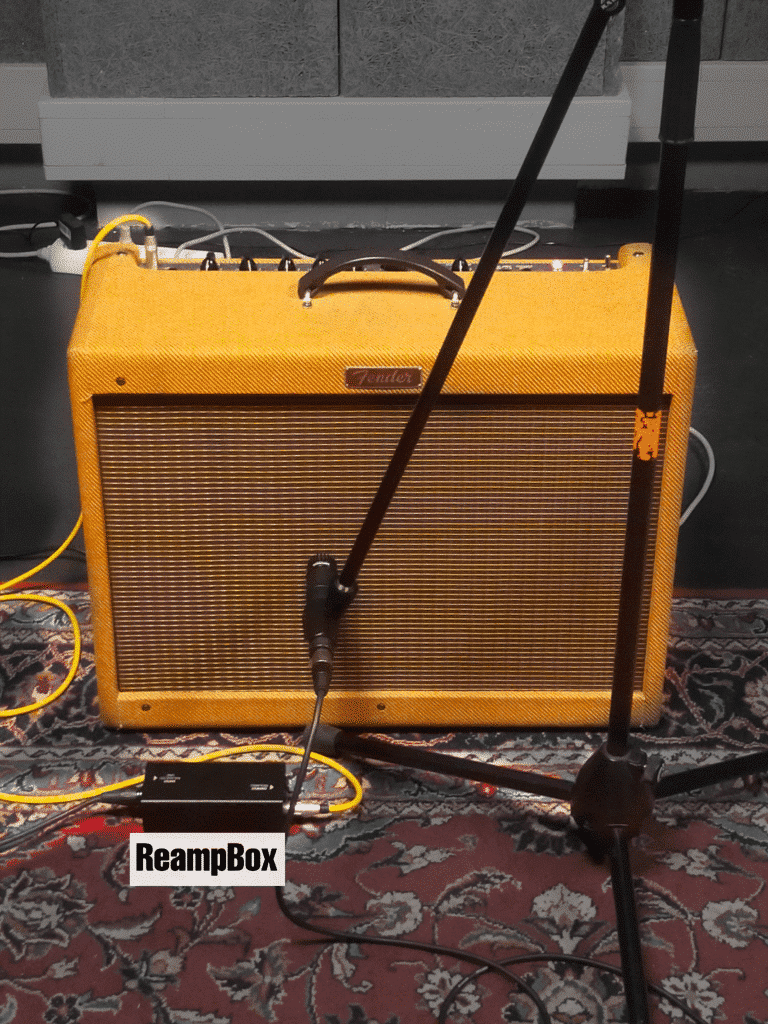
Practical Example 2: Fender Blues Delux Re-issue PR246
Setup is ready! (steps on computer)
Once everything properly set up:
- Play input.wav through the AMP (via Audio interface -> Reamp box), and;
- Simultaneously, record the output of the AMP-head and cabinet (via Input 1 and Input 2 of the Audio interface)
- Save the recorded file(s) on your computer.
These steps are also highly recommended after recording:
- Align: Make sure that the recorded tracks are aligned with the input.wav (it should already be the case since you’re recording while playing input.wav at the same time)
- Trim the recorded track(s) so that it’s the same length as the input.wav
- Normalize the recorded tracks
